Looking to start and grow a successful blog and share your passion with the world?
Are you ready to take the next step in your life and share your passion with the world? If your answer is yes then you’re in the right place cause we’ve done all the hard work of finding a reliable and great web host to become the home to your new blog.
We’ve put together an easy to follow step-by-step guide below to help you set up your new blog with a reliable web host (Bluehost) from start to finish.
Bluehost is your best bet, for reliable and affordable hosting with unmetered web space and bandwidth. It simplifies the process for beginners and provides reliable support. It’s never been easier!
And if you are still wondering whether starting a blog is the best move for you, then here are 9 Reasons You Should Start A Blog.
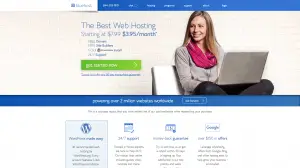
Step 1: Visit the Bluehost site (Click Here to access the Bluehost discount)
You should land on a page that looks like this.
Step 2: Select your plan

Take a minute to compare the different plan and see what they offer.
Choose the first one if you only intend to host one blog or website.
Choose the Plus Option if you want to host multiple blogs or websites, without domain or automated backups (you will have to backup manually). This is ideal if you are hosting your domain from a separate domain provider like Namecheap.com.
Choose the Prime Option if you want to host multiple domains, with domain privacy and automated site backup.
Step 3: Choose a domain
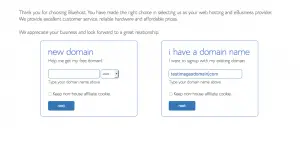
If you don’t already own a domain name, then enter in the domain name you would like. This can be your brand name or your name e.g. http://www.mybrand.com or http://www.myname.com.
If you are hosting your domain name separately from a domain provider like Namecheap.com, then enter your existing domain under the second tab.
Step 4: Enter your details
This is where you enter your details and billing address, as well as see the total of your purchase.
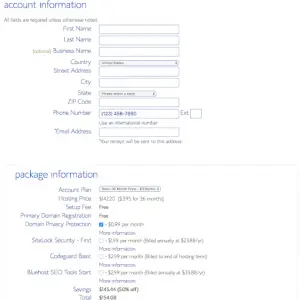
Tip: You save up more if you purchase hosting for more years.
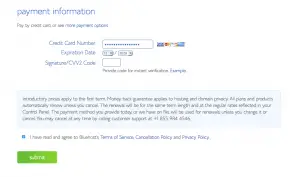
Step 5: Enter your payment details for the domain and hosting to be yours
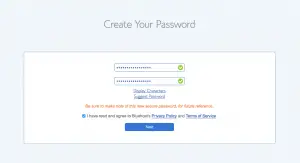
Step 6: Enter a password for your account
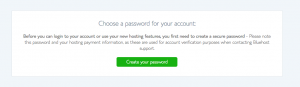
Choose a strong password for your account that you will easily remember.
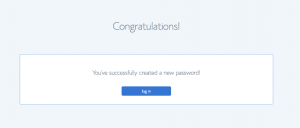
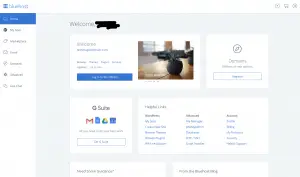
Step 7: Login to your new account
You will get this as a confirmation for your password setup. Then you can login to your newly setup account.
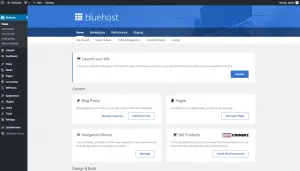
This is the dashboard you will see each time you login.
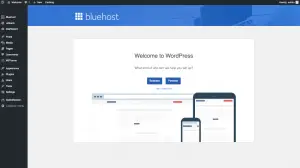
Click the “Login to WordPress” button to start setting up WordPress. You’ve paid for your hosting so this will be totally free.
Well done for purchasing your domain and setting up your hosting! Now all you need to do is set up WordPress and start with your blogging!
This brings us to the next step.
Step 8: Click on the “Start Building” button to setup your WordPress.

Your WordPress will be automatically setup and you will be redirected to an admin page that looks like this.
Here you can either click one of the options for extra help or you can click “I don’t need help”.
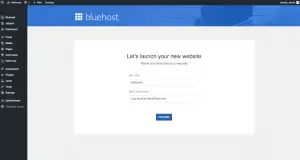
Step 9: Enter your site title and description
Here you will be asked to enter your Site title and a description. This can be your brand name and a short catch phrase. Your site name can be the same as your domain name or different and a description is optional (you don’t necessarily have to have one).
They will both appear at the top of your site.
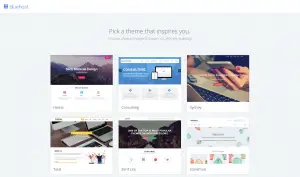
Step 10: Choose a theme for your site
A theme is the design of your website. WordPress has lots of free themes but these come with their limitations and may be difficult to personalize if you are a beginner but you can purchase premium themes from websites like Themeforest, Creativemarket and many others. These will have one-click design installs that you can easily modify and get support if you struggle along the way.
You can also pick a free theme for now, see if you can modify it to look like you would like and if you struggle then you can always purchase any one from the market places listed above.
Congratulations! You have personalized your site and you are ready to launch and start blogging!
Tip: Only launch and tell people about your blog when you have at least 2 or more posts.
Once you have set up your blog, it’s now time to set up a theme for your blog and you can find a list of the best places to buy a great premium theme by checking out these 25 Places Pro Bloggers Buy Themes.
You can also check out these 8 Things to do after starting a new blog and these Cool Tips from Experts for New Bloggers!!
