Hey there! If you’re reading this you may at a place where you’re ready to share your awesomeness with the world and start your very own blog. Or maybe you already started one and are not sure if you started it the right way. Either way, you’re in the right place because here is an ultimate guide that will show you a deal-breaking way to start a blog from scratch.
I’ve shared this for the sake of those who are about to start their journey as bloggers and are not sure how or where to start.
Your blog is not just something you set up for the first two, three or even five years. It is something that can sustain you for decades.
Because of this, it is crucial to lay a solid foundation, to focus on things ahead.
To learn how to create a blog from scratch, I’ve outlined below an easy-to-follow guide to place you on the right track.
Without further ado, let’s dive into how you can start building your blog the right way so that you can have a successful blogging journey.
Table of Contents
6 Steps to Start a Blog from Scratch
Step 1. Make Your Decision
Decision-making is the first and most crucial stage in your blogging career.
Here, you need not only build passion towards blogging but also decide to venture into it.
Many people would always say; I love blogging; I want to be a blogger, have my blog, start a blog, and so on.
For one reason or the other, they never get to start their blogs.
The fact is that there’s a vast disparity between wanna-be bloggers and those who have made the decision to get into it straight away.
This process on its own is a battle that needs courage to be won.
At this stage, you should have a reason for wanting to start a blog and the set goals you want to achieve if you get into it.
So make the decision to stop procrastinating and get it done with.
Step 2: Find a Niche
Once you make the decision to go into blogging, you should ask yourself which niche you want to blog about. In other words, what are you passionate about, and what do you want people to know you for?
When picking a niche, there are many fields to look at and several niches within those fields that also have micro-niches within themselves.
Field:
Remember the science, commerce, business, law, health, and art stuff?
Well, these are all fields you may choose to cover on your blog.
You can choose to focus on health topics, science, or any other.
Another word for field is industry.
The problem with taking a whole field for your blog is that it is too generalized and may not be suitable for targeting audiences, not to forget that the competition is stiff.
Niche:
Now, bloggers are no longer leveraging fields like before, but now what we call niches.
With a Niche, we narrow down our scope to something within a field or something you may choose to call sub-fields.
Let’s say you want to discuss health.
It is a broader area and includes various subfields such as nutrition, Fitness, psychiatry, physiotherapy, optometry, and things like that.
Let’s say you want to go into Fitness; you can also narrow your focus to something like Yoga, in a process called “Niching Down.”
Most fields are saturated, and niches are also getting occupied to a point where the keywords you rank on your place are beginning to turn golden due to high competition.
Micro Niche:
The above name is the new goldmine, a Micro niche blog.
We’ve talked about niching down lately. It is essential in eliminating competition.
If, however, you want to stand out even; further, you’ll stop most of the competitions as well.
Let’s use the example of the Yoga niche; there is a possibility to open smaller slots on that. A blog that discusses narrow areas like this can be called a micro-niche blog.
You may choose to focus on Yoga for females at 18-22 years or focus on only pregnant women.
When you do this, you narrow down your scope, and audience targeting becomes more apparent.
Note: You can decide to go for a field, niche, or micro-niche Blog, and all could result in your success with the right effort in place.
Step 3. Choose a Domain Name
Here we come to the actionable part.
When everything is in place, the next thing to do is find a name for your BlogBlog.
From then on, that’s the name your Blog will adopt.
Let’s say, for example, your blog focuses on yoga. Having a name like “my fitness journey(dot)com” will be too general, and your yoga audience may have the impression that you are too broad for their liking.
There are several things to pay attention to when picking the right domain name for your blog:
- Make your domain name stand out.
- Make it brandable.
- Look professional
- Make it purpose-driven toward your cause or objective
- It shouldn’t sound misleading.
- Should be easily spelled and recognized by others.
The thing is that there are more reasons and things to pay attention to when choosing the right domain name for your blog, and also remember that your domain extension matters a lot.
Make sure you match your domain name with the correct extension.
Most blogs out there choose to go with the Com (.com) extension, but some may go for the Me (.me) extension, blog (.blog) extension, Net (.net) extension, and several others.
Your domain extension has the potential to grade your site based on professionalism, personality, objective, coverage, and more.
Afterward, it would be best if you approached a domain name provider.
There are several services out there that offer domain names. Some are free, like the Freenom domains, WordPress extension domains, and the Blogspot domain names.
However, you may want to showcase your seriousness about blogging and make your audiences trust in you by choosing paid and professional domains that can leverage sites like Namecheap, Bluehost, Hostgator, and several others leveraged for your paid domain names.
Step 4. Choose Your Domain Host
Right after securing your domain name, the next thing to do is consider a hosting provider.
Before we host our domain name, I would highlight to you what a CMS is all about.
It stands for a Content Management System.
A Content Management System is a service provider that lets you manage your blog or any website without getting to program or get into coding a blog from scratch.
As you may have noticed, most bloggers have no web programming knowledge, and some don’t know the primary programming languages, but still, they’re able to air out their blogs, publish content and reach their goals without the need for coding a blog from scratch.
Well, this is possible only with a Content Management System in place.
The most preferred Content Management System for bloggers and other websites is WordPress.
WordPress powers 35% of the entirety of websites on the internet(Digital). Because of this, I will make my assumptions for you on WordPress.
Now, the moment you have the domain name ready, your next step would be to pick a hosting provider.
Several of the hosting services that offer those domain names to you can also host your site. Still, for the reason that sometimes a platform may provide a good domain name service and poor hosting, or vice versa, you’ll want to host your blog independent of your domain name provider.
There are top-notch hosting services out there, and their subscriptions vary as well. I recommend Namecheap for buying a domain and Bluehost for hosting your website.
Here is a step by step guide to buying and setting your hosting with Bluehost:
Bluehost is your best bet, for reliable and affordable hosting with unmetered web space and bandwidth. It simplifies the process for beginners and provides reliable support. It’s never been easier!
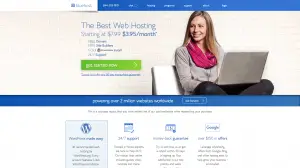
Step 1: Visit the Bluehost site (Click Here to access the Bluehost discount)
You should land on a page that looks like this.
Step 2: Select your plan

Take a minute to compare the different plan and see what they offer.
Choose the first one if you only intend to host one blog or website.
Choose the Plus Option if you want to host multiple blogs or websites, without domain or automated backups (you will have to backup manually). This is ideal if you are hosting your domain from a separate domain provider like Namecheap.
Choose the Prime Option if you want to host multiple domains, with domain privacy and automated site backup.
Step 3: Choose a domain
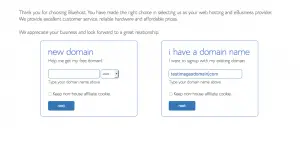
If you don’t already own a domain name, then enter in the domain name you would like. This can be your brand name or your name e.g. http://www.mybrand.com or http://www.myname.com.
If you are hosting your domain name separately from a domain provider like Namecheap, then enter your existing domain under the second tab.
Step 4: Enter your details
This is where you enter your details and billing address, as well as see the total of your purchase.
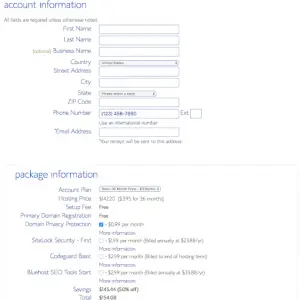
Tip: You save up more if you purchase hosting for more years.
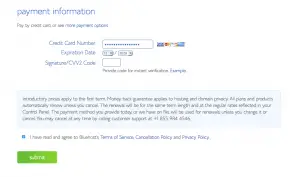
Step 5: Enter your payment details for the domain and hosting to be yours
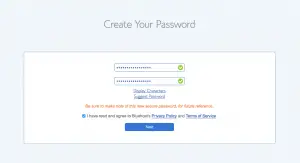
Step 6: Enter a password for your account
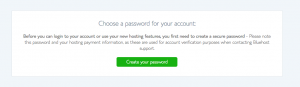
Choose a strong password for your account that you will easily remember.
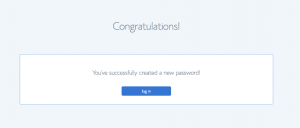
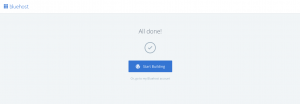
Step 7: Login to your new account
You will get this as a confirmation for your password setup. Then you can login to your newly setup account.
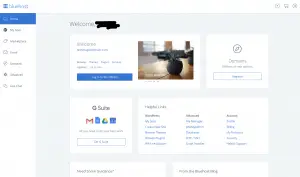
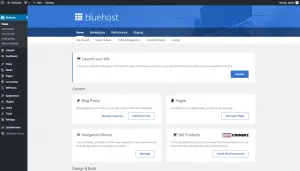
This is the dashboard you will see each time you login.
Click the “Login to WordPress” button to start setting up WordPress. You’ve paid for your hosting so this will be totally free.
Well done for purchasing your domain and setting up your hosting! Now all you need to do is set up WordPress and start with your blogging!
This brings us to the next step.
Step 8: Click on the “Start Building” button to set up your WordPress.
Your WordPress will be automatically setup and you will be redirected to an admin page that looks like this.
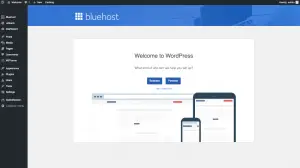
Here you can either click one of the options for extra help or you can click “I don’t need help”.
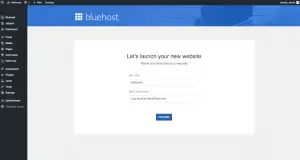
Step 9: Enter your site title and description
Here you will be asked to enter your Site title and a description. This can be your brand name and a short catch phrase. Your site name can be the same as your domain name or different and a description is optional (you don’t necessarily have to have one).
They will both appear at the top of your site.
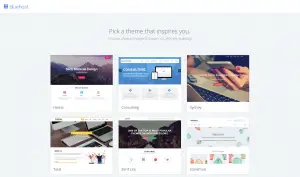
Step 10: Choose a theme for your site
A theme is the design of your website. WordPress has lots of free themes but these come with their limitations and may be difficult to personalize if you are a beginner but you can purchase premium themes from websites like Themeforest, Creativemarket and many others. These will have one-click design installs that you can easily modify and get support if you struggle along the way.
You can also pick a free theme for now, see if you can modify it to look like you would like and if you struggle then you can always purchase any one from the market places listed above.
Congratulations! You have personalized your site, and you are ready to launch and start blogging!
Step 5. Design Your Blog
Now that you’ve got your domain name mapped to your host, you may decide to launch your blog. However, We need to get through with the design before that.
Install a theme on your blog, or if you’re cool with designing one yourself, you can also do it.
It is good to know that there are default templates to begin with, but most do not qualify for professional and personal purposes.
Because of this, you may switch to a custom free theme or paid one, and if you’re on WordPress, there are thousands you can get for free or for a fee. It all depends on your requirement and how you want your site to look.
There are also extensions or plugins you can install on your blog to help you handle things with ease, and some may come as default with your CMS so that you can find more vacation-taking items.
When designing your blog, make sure you consider the following:
- Search engine friendliness.
- Responsiveness to mobile devices.
- Cross-platform compatibility.
- User-friendliness etc.
Step 6: Publish Your First Content
The moment you hit that site publishing button from your dashboard, your site is accessible to everyone from everywhere around the world.
Now, you should get everything on your site ready for the viewers.
Start by filling things on your site, especially in the pages, by defining your:
- About Us page
- Disclaimer
- Copyright statement
- Contact form or page
- Homepage, favicon, header, and footers, etc.
When everything is in place, spend a day or two looking at how far you’ve gone, and if there are more things you should attend to before writing your first blog post, do so.
Once you discover that nothing else is missing and your site pages are loading well and intact, you can now head up to publish your first post.
This stage is always the exciting part, so make sure you make it a historical one by posting the best content you have in mind.
Please don’t be scared about your first blog post; instead, feel excited about it and get things done.
You may not get anyone to view your first blog post, but if you could self-promote by leveraging family & friends, social media communities, and more, the chances are that you could start realizing that first viewership.
Here is a free detailed guide that will teach you how to create content that is evergreen.
Finally
As much as I would love to encourage anyone to start their blogs, I must admit that there’s a rough line ahead.
The point where you get frustrated is when you realize few views for the content you spend days writing, but you’ll cherish every bit of that moment when you go far on your journey with time and improvement.
I want you to know that blogging is a marathon, not a sprint, and with the proper skillset and hardworking, success will come knocking.
Do you now feel ready to start your blog the right way and build a successful blog? Share your new blog in the comments below.
And if you are still wondering whether starting a blog is the best move for you, then here are 9 Reasons You Should Start A Blog.

Really useful tips — I’ve been blogging a long time but having these tips when I first started out would have been so useful/ Thanks so much for sharing!
This is such great info! I wish I had all something like this when I first started out. It would have saved me a lot of time. Thanks for sharing!
Great tips!! Definitely a good start to make up your decision and know what you want from blogging before starting. Thank you for sharing!!
These are really great and easy steps to follow. I already have a blog but like to check I’m not missing anything. Having my own domain name was really important. I always think blogs don’t look as great when they’ve got wordpress of whatever in the domain name. I’m lucky that we have a server to host my blog on. But buying the domain name was super easy and really helps professionalize the blog
Excellent post! Especially love your suggestion to select a micro niche. I agree this is where some real
Value is
You always have brilliant ideas! I have started a month ago really, having dabbled with odd articles once in a while. Now I am taking it seriously and enjoying it but you are right, such a hard slog.